

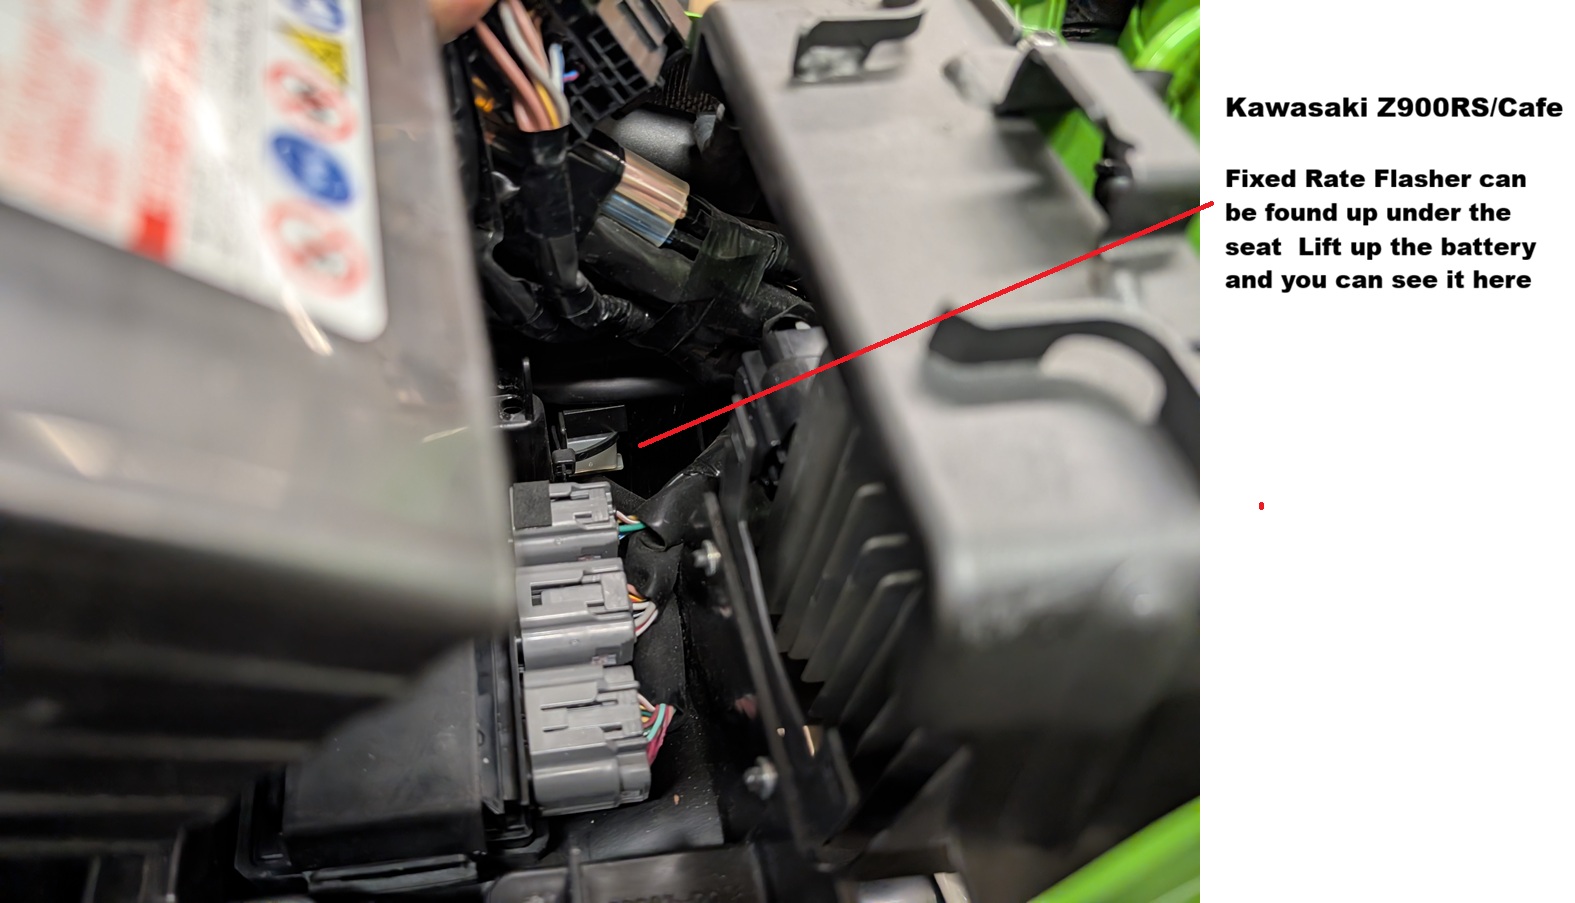
   Home > Instructions > Kawasaki Z900RS - Installing Front LED Turn Signal Kit This is a general guide to installing the LED turn signal kit we sell for the Kawasaki Z900RS and Cafe. This item is available at the following link... KAWASAKI Z900RS / CAFE LED TURN SIGNAL KIT INSTALL: The instructions below provide a high level overview of what it takes to install the LED turn signal kit on your 2018+ Kawasaki Z900RS and Z900RS Cafe. This guide can be used to install both the front and rear LED turn signals... NOTE: Please make sure your ignition is off when you are working with turn signal wiring on the bike, otherwise you could blow a fuse. 1. Remove the stock turn signals you are replacing, following the wiring for each turn signal to where they plug into the turn signal harness on the bike. Pay special attention to how the wiring is run, that way you can run the new LED turn signal wiring the same way, and also pay attention to how the wiring harness was packaged, that way when you are finished with the wiring, you can put everything back the way it was with the stock turn signals. When you unplug each stock turn signal, mark the connector plugs on the bike "left" and "right" so that you know which is which when you go to plug in the new LED turn signals. 2. Next you will want to mount the new LED turn signals to the stock turn signal mounts, using the turn signal mounting plates included with the kit. Run the LED turn signal wiring the same way the stock turn signal wiring was run, back to the wiring harness. 5. After you've run the wiring to the harness, you may need to trim excess wire off the turn signal wires since some LED wiring can be extra long. Once you do that, you are ready to connect the LED wires to connector plugs included in the kit. Bullet crimp connectors are included with the LED turn signals, so those can used to connect the plugs to the LED wires. Some of our customers will skip the bullet connectors, and use butt connectors, or sometimes even solder the wiring. It's your choice how you want to connect them. 6. Once the connector plugs are installed on the LED wiring, you can plug them into the harness on the bike just like the stock turn signals were. 7. Once you have everything connected, and before you button everything up, test that the new LED turn signals function properly. Turn the ignition on and make sure the new LED's come on as running lights. Next, test that the correct turn signal flashes, both the left and right side. Also make sure your tail light and brake light still function properly. Start the bike and do the same checks. 8. If everything is working properly, you can put everything back together by packaging the wiring in a similar way to how the stock turn signal wiring was packaged. Re-install any bodywork, and you're ready to ride! NOTE: We recommend always checking to make sure your turn signals and brake light are working properly before you leave on a ride. This should be part of every riders pre-ride checklist. FIXED RATE FLASHER INSTALL: If you purchased the optional Fixed Rate Flasher module, it plugs in up under the bikes seat. You un-plug the stock Flasher Module and the included module replaces it. It's a little tricky to find the stock Flasher Module, because Kawasaki buried it pretty good under the seat. If you cannot locate the stock flasher relay on your Z900RS, email us at sales@soloracer.com and we'll try to help you out with some additional photos. |
WARNING! - Motor sports can be extremely dangerous, injury or death can occur. No warranty is made or implied regarding any product sold by Devo Tech, Inc. / SoloRacer.com to protect users from injury or death. The user assumes all risks. Please read the rest of our Legal Disclaimer before ordering. Our on-line store is up and running 24 hours a day, 7 days a week. We use secure servers for all transactions so you can shop with complete confidence. If you are uncomfortable ordering online, call or email us for more ordering options. |