


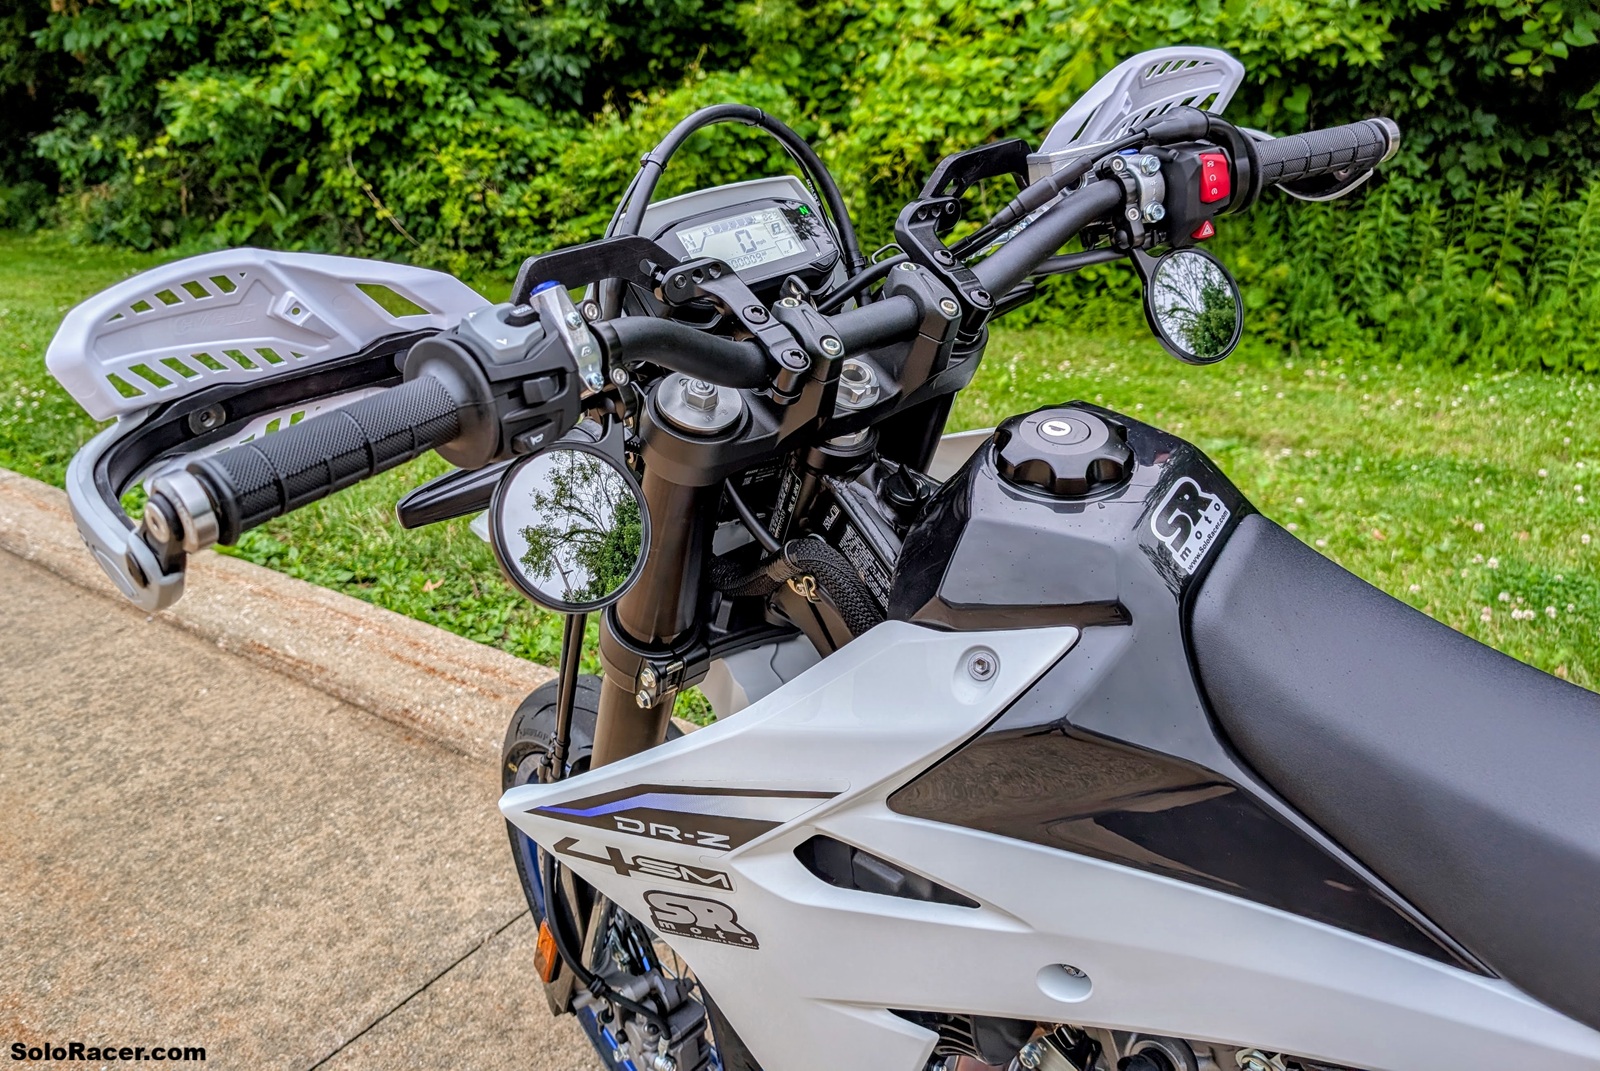
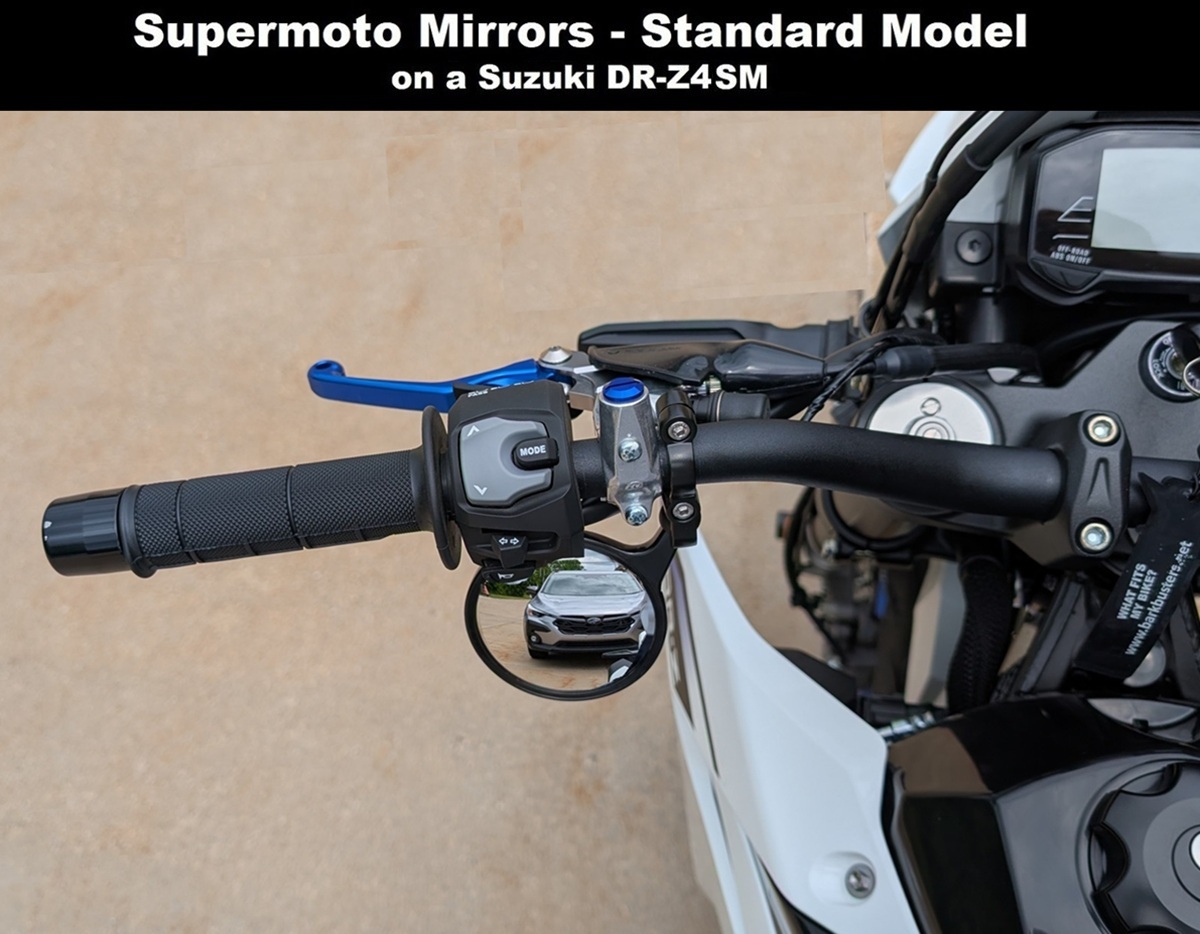
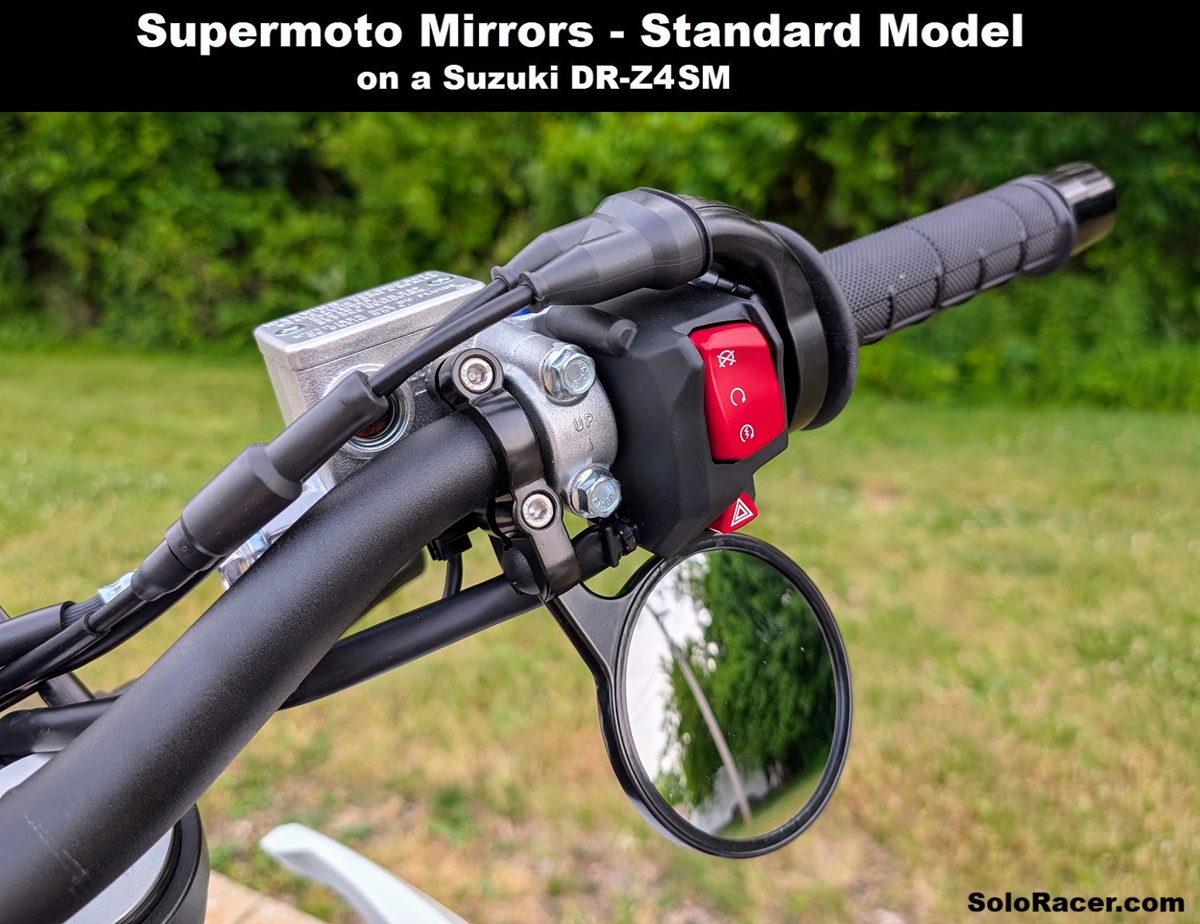
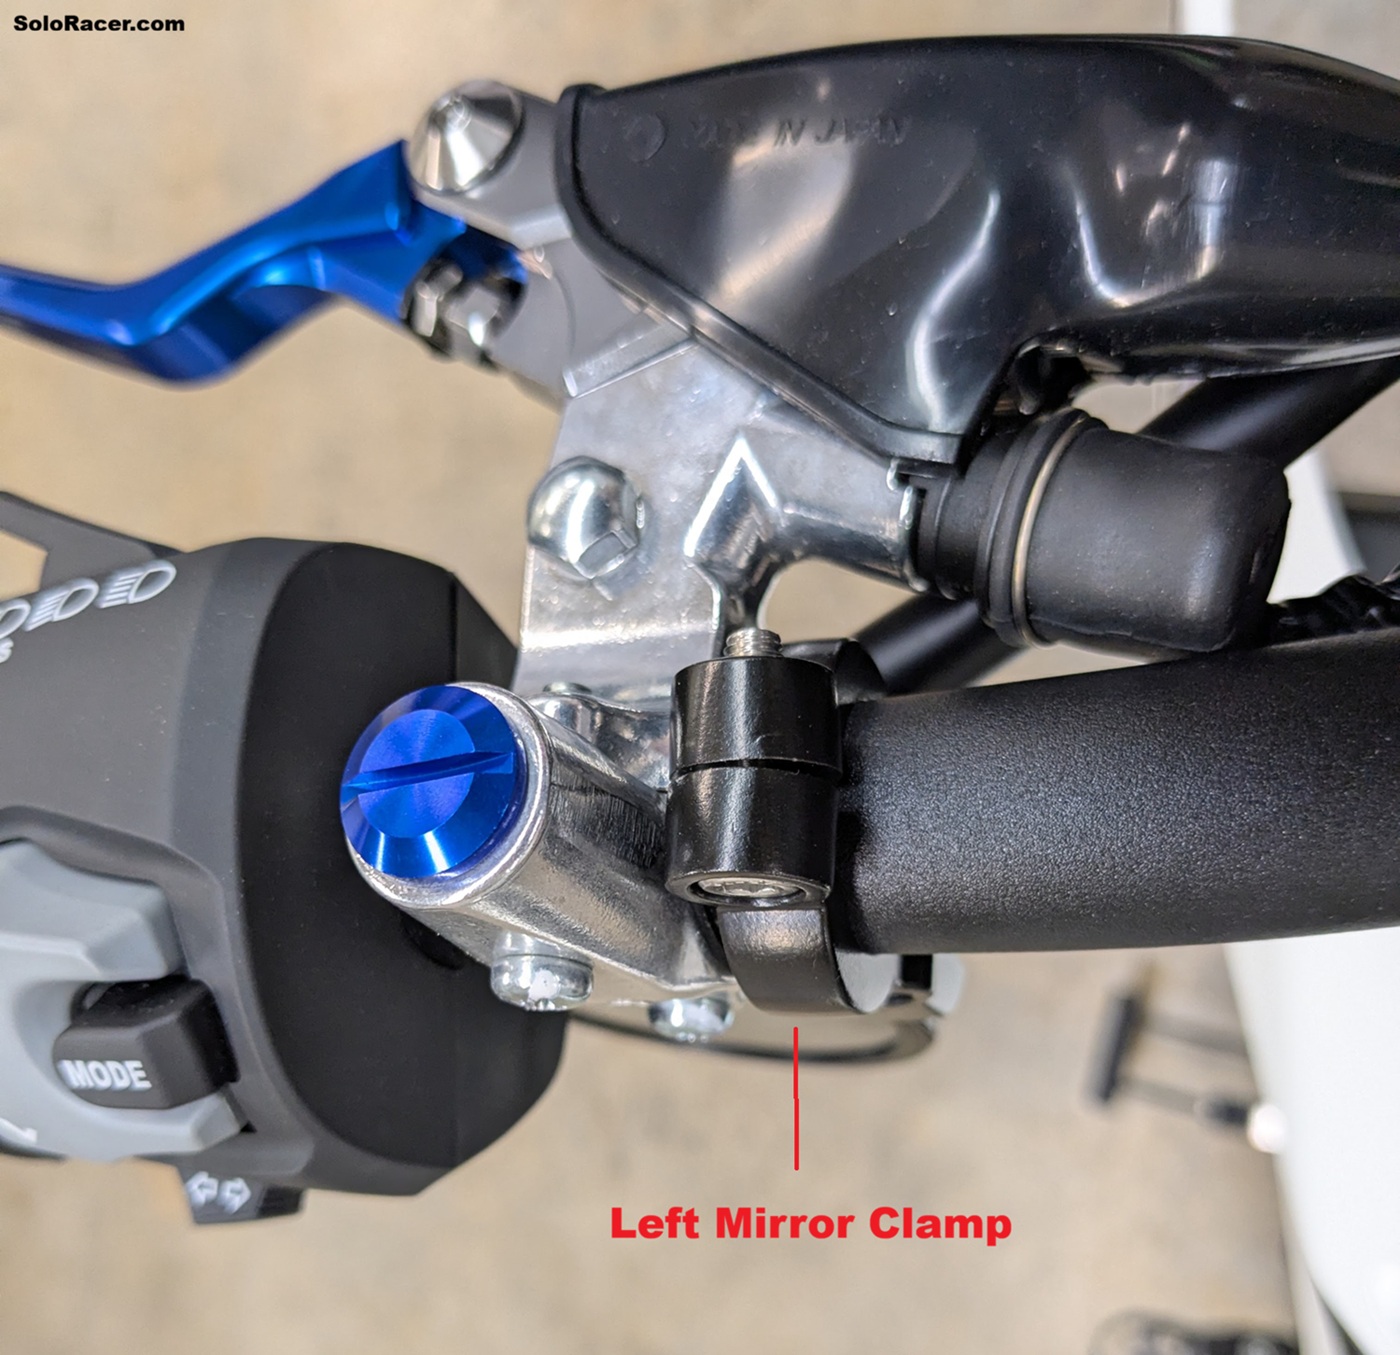
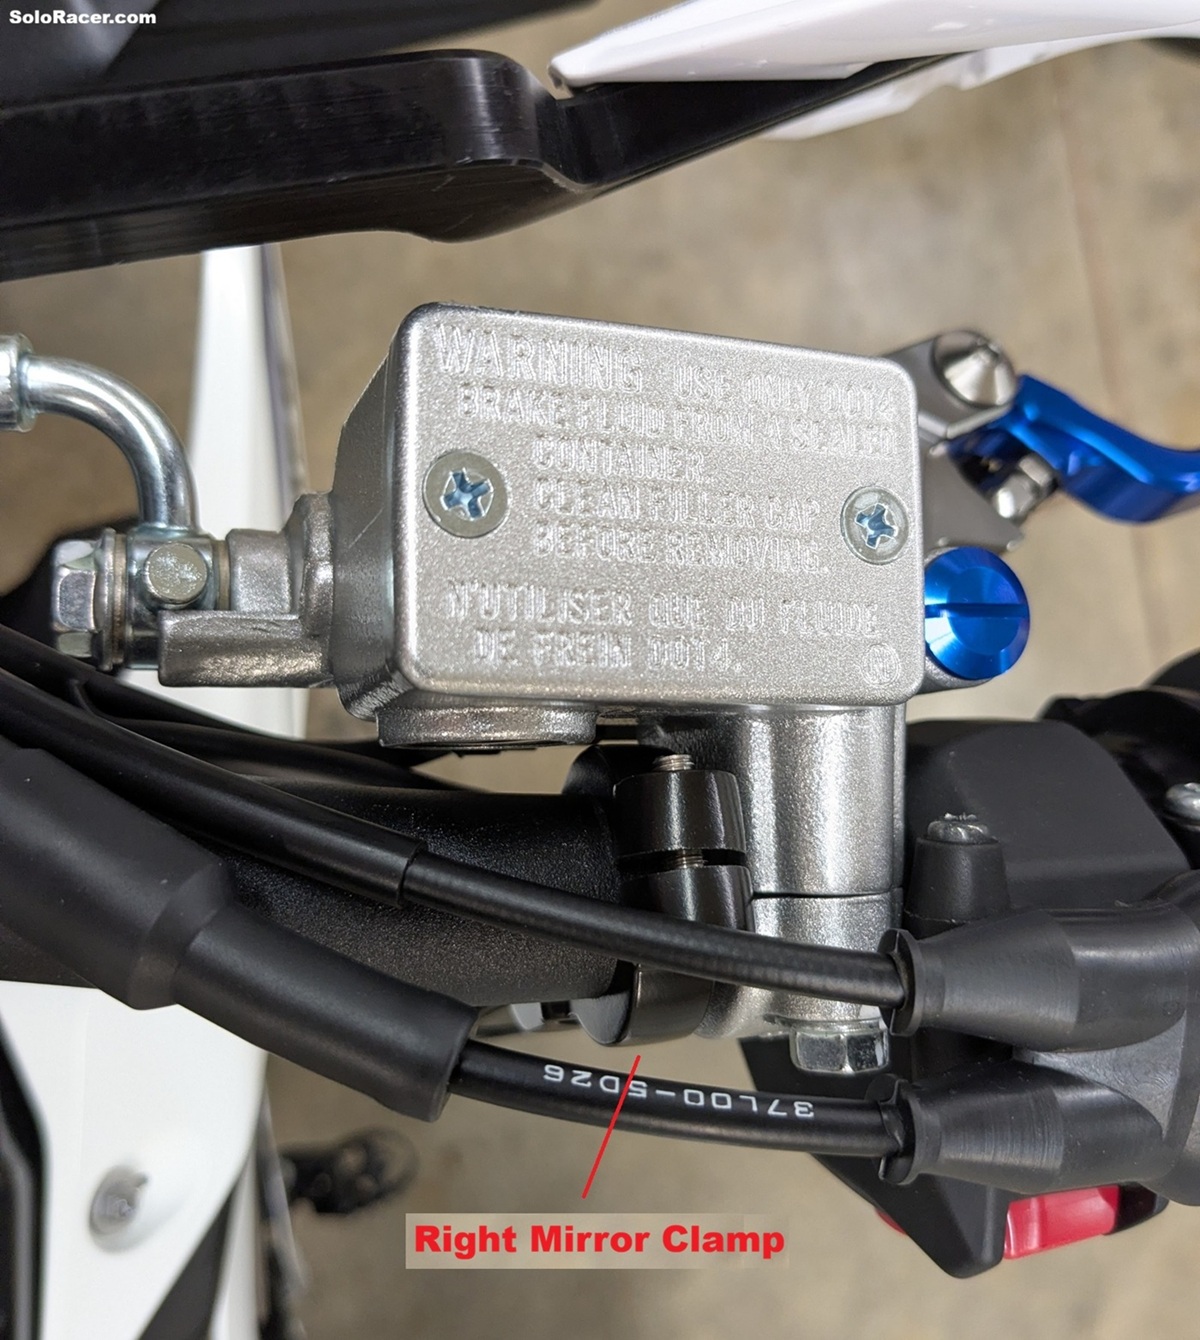
     Installing Supermoto mirrors on Suzuki DRZ4SM / DR4S - Tips and Tricks NOTE: These installation instructions are specific to the 2025+ Suzuki DRZ4SM / S, but also apply to the older Suzuki DRZ400SM / S models since the mirrors mount on that bike pretty much the same way. 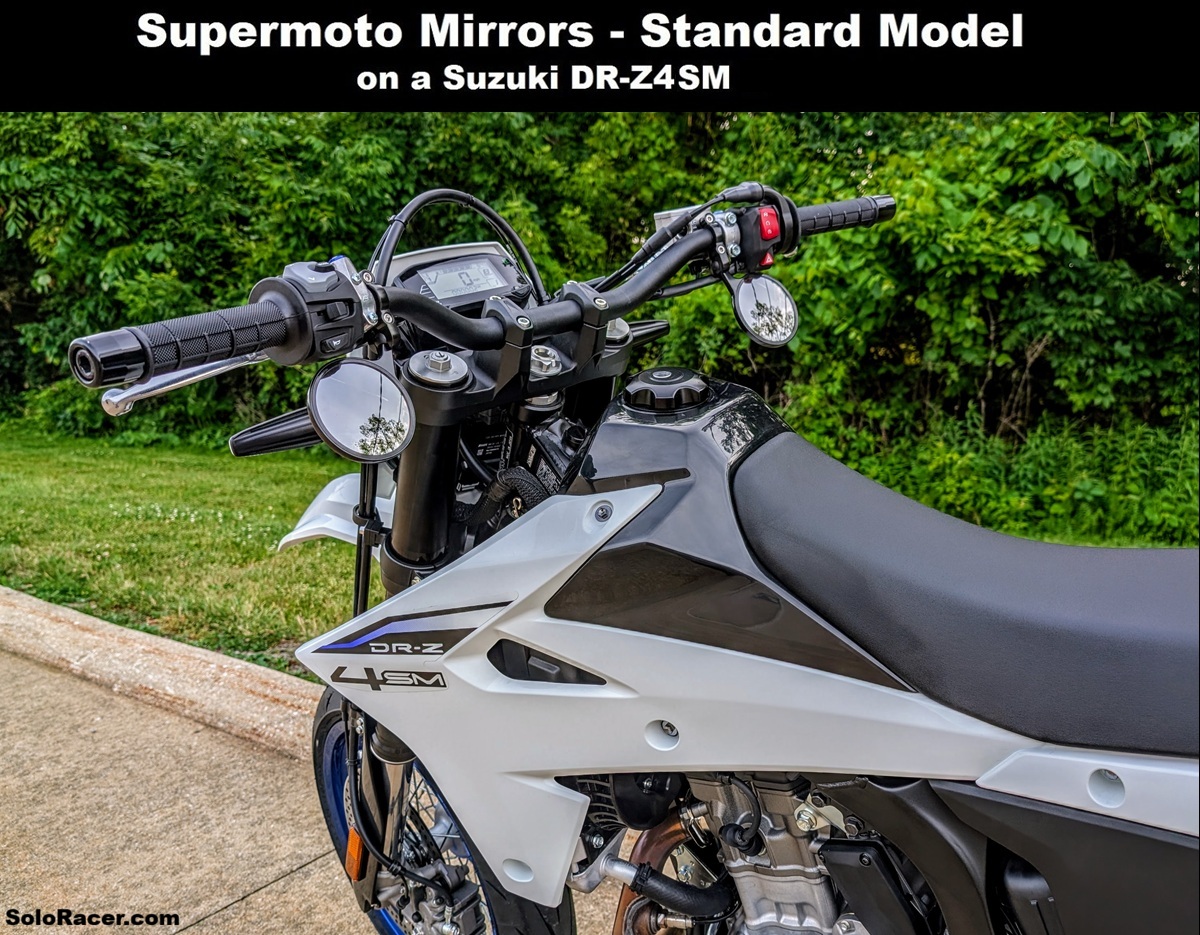 Overview: Our Supermoto mirrors are made from high quality billet aluminum, and are NOT cheap 3D printed plastic! You can mount them in the end of any handlebar as a bar end style mirror, or remove the bar end inserts, and clamp them to virtually any handlebar, like we do on our project bikes (see photos). These mirrors will fit most Supermoto and dual sport motorcycles, like the Suzuki DRZ4SM / DRZ4S / DRZ400SM / DRZ400S. The mirror clamps are sized to fit the 7/8" part of the handlebar out near where the controls are mounted, if you try to mount the clamps on oversize handlebars where the bars taper up and get bigger, then the clamps won't fit. Installation is pretty simple on the new DRZ4, but there are a few things that can make it simpler. When you open the package, the bar end inserts will be installed in the clamp of each mirror. For the DRZ4 and DRZ400 models, you will want to loosen the mirror clamps up and remove the bar end inserts since they won't be used, and instead you are going to clamp the mirrors to the handlebars as shown in the photos above and below. Installing Left Side (clutch side) Mirror: Installing the left side mirror is the simplest of the two since there is more room around the clutch lever perch. Disassemble the mirror clamp by removing the 2 screws/nuts. Pay special attention to the lengths of the screws, they are different, and the longer screw goes nearest the nylon ball on the mirror. Insert the back side of the clamp behind the handlebar between it and the clutch lever perch, then attach the front side clamp and install the screws/nuts but leave them loose. On the older DRZ400 models it might be helpful to loosen up the clutch lever perch in order to get the mirror clamp installed. You will want to mount the clamp as close to the clutch perch as you can get it. Insert the mirror into the clamp, then snug up the screws alternating back and forth between the two until the clamp is just barely holding the mirror in place so it can still be moved around and is not flopping around. You will adjust it later once you have both mirrors installed. (click for photo 1) (click for photo 2) Installing Right Side (brake side) Mirror: Installing the right side mirror is a little trickier on the DRZ4 since the front brake master cylinder is so close to the handlebar right where you need to mount the clamp. Start by loosening up the two bolts holding the brake lever perch to the handlebars. You don't need to remove the perch, but loosen it quite a bit so you can move it out away from the handlebar. Once you do that, disassemble the mirror clamp, and slide the back half of the clamp in between the master cylinder and the handlebar. Then attach the front side clamp and install the screws/nuts but leave them loose. You will want the clamp as close to the brake lever perch as you can get it. Insert the mirror into the clamp, then snug up the screws alternating back and forth between the two until the clamp is just barely holding the mirror in place so it can still be moved around and is not flopping around. Once you have the mirror in position, be sure to tighten the brake lever perch back up. The control housing on this side is larger, so you will want the mirror pressing right up against the bottom of it. (click for photo 1) (click for photo 2) Adjusting The Mirrors: Now you will want to sit on the bike in your normal riding position and adjust the mirrors so you can see both to your sides and also behind you. You will need to play around with the positioning of the clamps and mirrors to get things just right, take your time doing this. Once you get the mirrors where you want them, it's time to tighten them up. You'll want to tighten the screw closest to the nylon ball first and get that one tight first, then snug the other one up. If you tighten the top one too much at first, you then can't get the bottom screw near the nylon ball tight enough to hold the mirror in place, because the top screw is too tight at that point. DO NOT really crank down on these screws, they are small in size and you can strip them or even crack the mirror clamp if you tighten them too much. Once you get the mirrors adjusted the way you want them, turn your handlebars lock to lock and make sure the mirrors do not contact the gas tank or tank shrouds. If they do, one thing to look at is to make sure your handlebars are centered in the handlebar mounts. Oddly when we first installed these mirrors on our DRZ4SM Project Bike, the right mirror was hitting the gas tank/shroud at full lock, but the left one wasn't, which didn't make sense. After about 20 minutes of messing with it, we noticed that our handlebars had been mounted off center, and we needed to re-center them in the handlebar mount. They were also rolled to the rear so we moved them a little forward. Once we did all that, our mirrors clear the tank/shrouds. Post-Installation Check: Make sure everything is tight! Check the mirror clamps one more time, and then also anything else you might have loosened up like the brake lever perch, maybe even the clutch perch, or handlebar mounts. It's also a good idea to check these screws/nuts periodically to make sure nothing loosens up. Installing the Optional Mirror Hole Plugs: As an option with our Supermoto Mirrors, we offer anodized mirror hole plugs that thread into the clutch and brake perches after you remove the stock mirrors. The Suzuki DRZ4 and previous DRZ400 both use our standard thread mirror hole plugs. We've had some customers insist that their bike has reverse thread holes in the perch, but that's because they are leaving the adapters in the perch when they remove the stock mirrors. You'll need to remove those threaded adapters as well, and then our standard thread mirror hole plugs will thread directly into the perches. More info on these mirror hole plugs here. Video Overview: The video below will give you an idea of where we mounted the mirrors on the handlebars of our DRZ4SM project bike, and how we positioned the mirror clamps on each side. PURCHASE AT THE FOLLOWING LINKS: Click links below... |
WARNING! - Motor sports can be extremely dangerous, injury or death can occur. No warranty is made or implied regarding any product sold by Devo Tech, Inc. / SoloRacer.com to protect users from injury or death. The user assumes all risks. Please read the rest of our Legal Disclaimer before ordering. Our on-line store is up and running 24 hours a day, 7 days a week. We use secure servers for all transactions so you can shop with complete confidence. If you are uncomfortable ordering online, call or email us for more ordering options. |